Digimaps - Map a daily walk!
Digimap for schools – Home Learning Activity – Mapping a daily walk J
As you get your daily exercise in, why not improve your geographical skills at the same time…
1. Login to Digimap for Schools at https://digimapforschools.edina.ac.uk/login using the schools details: Username: B735SD
Password: conths2385
2. On the main screen, use the search box to search for your postcode.
3. Now you can see your local area, decide where you want to walk! You could plan the route on Digimap before you set off, or track it later like I did!
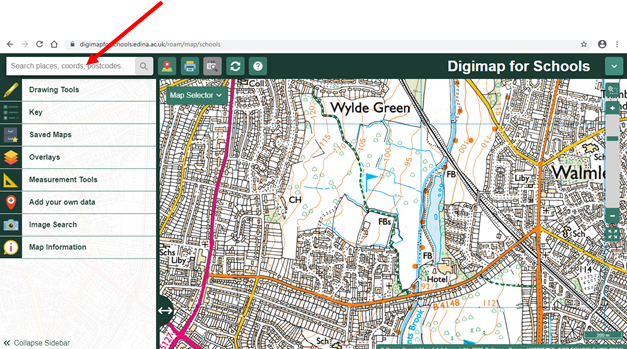
4. Before I went on my walk, I printed off my map by selecting the ‘print’ function. The programme converts it to a PDF ready to be printed. (TIP: Keep zooming out of your map, depending on how far you want to walk! Make sure the area you want to cover fits on the print out).
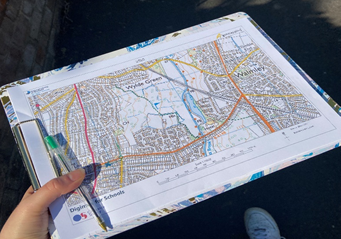
5. Be sure to take a pen or a pencil with you, so you can map where you have walked!
On your walk, look out for as many geographical features as you can! These may include:
Physical features: trees, forest, a valley, hill, river, lake, weather, vegetation, soil
Human features: house, road, farm, shop, train track

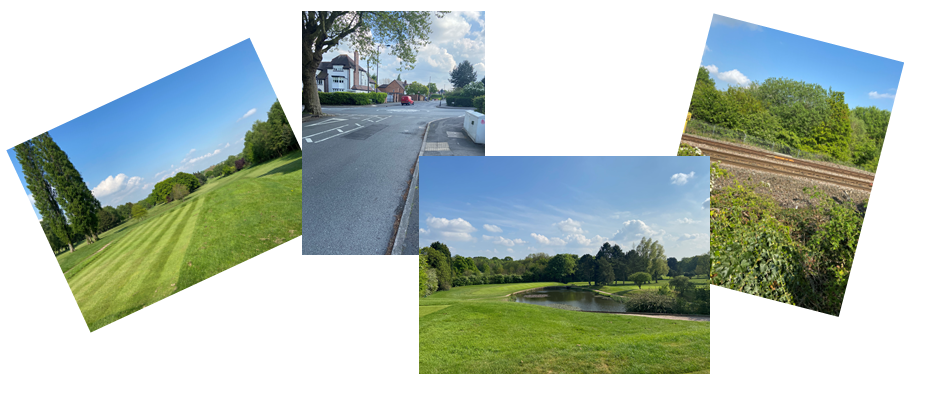
6. Take lots of photographs! These can be added to your map later on Digimaps!
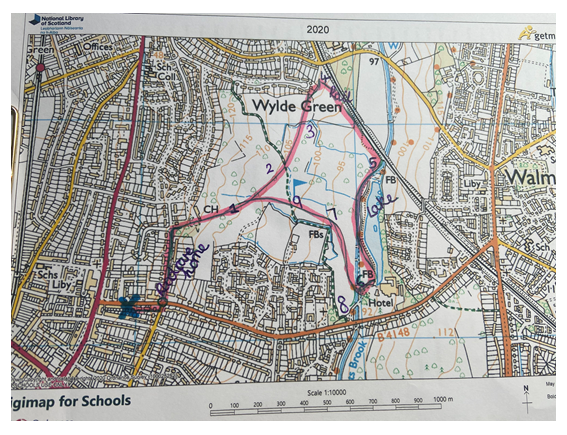
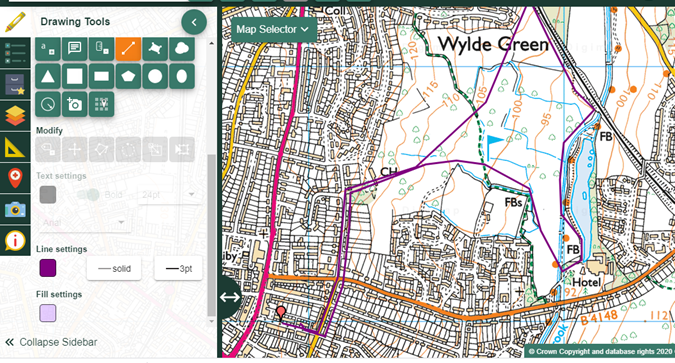
7. Make notes on your printed map too. I walked around Walmley golf course, so I decided to map where the first nine holes were on mine! Your map will look something along these lines …
8. When you return home, open Digimaps back up, so you can map your route digitally.
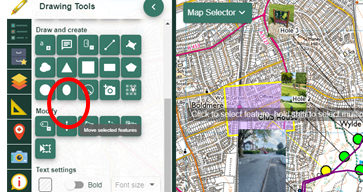
To do this, select the ‘Drawing Tools’ feature on the toolbar. Use the ‘Draw line’ function to begin.

Here, I have mapped my route using a purple coloured line. I have also added a ‘marker’ to pin point my house.
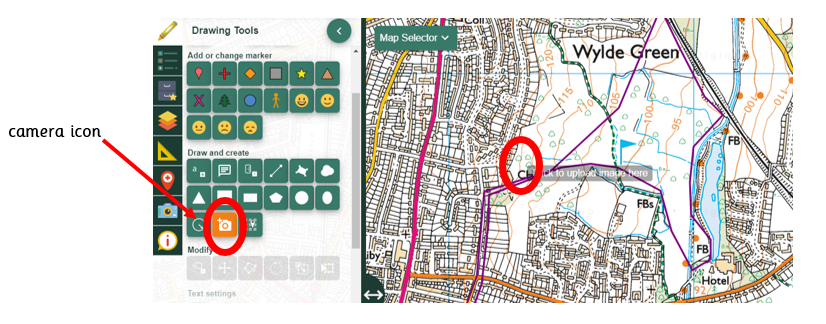
9. Next, I added my photographs! Before this step, make sure your photographs are saved in a folder easy to find on your computer.
To add a photo, simply select the camera icon, and then click on your map where you would like the picture to go. Here, I am uploading a photo of the clubhouse, so I am clicking right next to ‘CH’ on my map.
I had all my photographs saved in one folder. I have also named them so I could easily see what the photo was of.
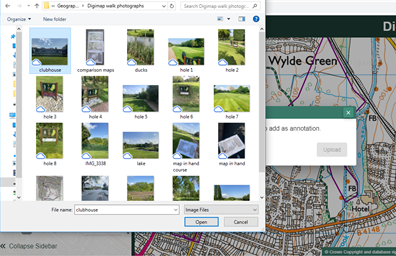
Here is my photograph. I will now add the rest!

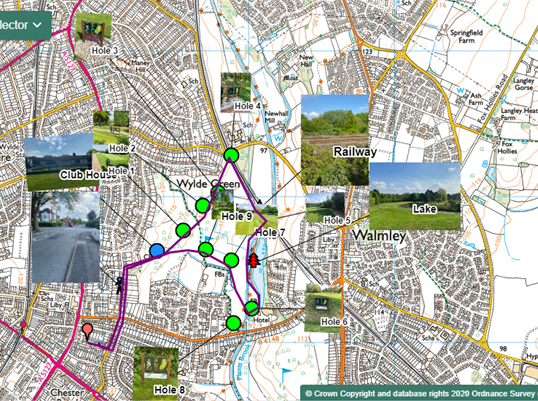
My map is complete. I have located the nine holes and anything else that took my interest. I’m sure you will discover much more on your walks!
Tips when adding photographs:
- To move a picture: Click ‘select’ and then click your photo
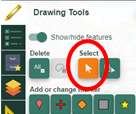
- When it highlights your photo yellow, click ‘move selected feature’ which is represented by four arrows. This will allow you to move it.
- The icon to the right of ‘move’ which is called ‘modify selected feature’ will allow you to make the picture smaller or bigger.
- The icon to the left of ‘move’ will allow you to add a label to your picture, as I have done on my map.
10. Measure how far you walked!
To do this step, simply click the ‘Measurement Tool’ on the left hand toolbar.
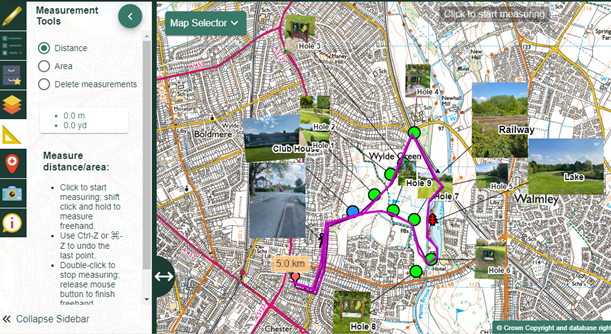
My walk was 5km!
Most importantly, have fun and be safe! Send or tweet us a photo of your completed maps. We would love to see them!